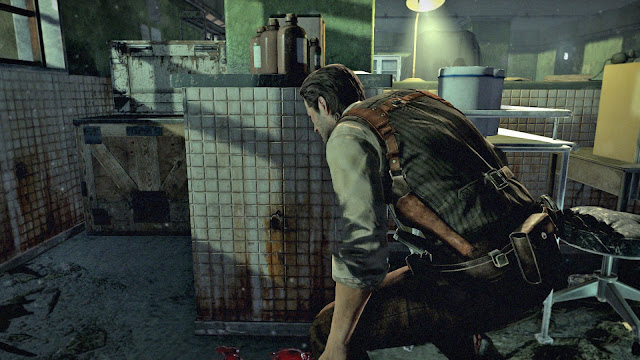
Of all the games that I have played in high difficulties and crazy modes, even the most hardcore ones, the Akumu mode of 'The Evil Within' has to be, by very far, the toughest and most unforgiving. Set on the highest difficulty level of the game, this mode additionally has Sebastian die with the slightest hit. In the essence, what this challenge requires from the player is to go through the chapters without taking any damage. Aknowledging this, however, doesn't make the whole experience any less frustrating, given that even if you manage to dodge enemy attacks, you may very well die by accidentally stepping on a bear trap or because a seemingly fallen zombie unexpectedly waves its arm and scratches Sebastian's knee. What makes The Evil Within's Akumu the most insane of such challenges is that your window of safety is extremely limited, to the point that Sebastian may die if a zombie does so little as barely touch him. 'Akumu' means 'incubus' in Japanese, and after conquering this mode myself, I can assure you it is this way for a very good reason.
The game won't let you choose the Akumu mode on a New Game Plus, which means that the first time you play in this difficulty will be in a fresh New Game. That said, there are certain things to keep in mind as you go:
» You shouldn't waste green gel on upgrading Sebastian's life gauge, syringe-carrying capability or syringe recovery. It doesn't matter if your life is just one dot or one full bar; if you get hit, you will instantly die anyway.
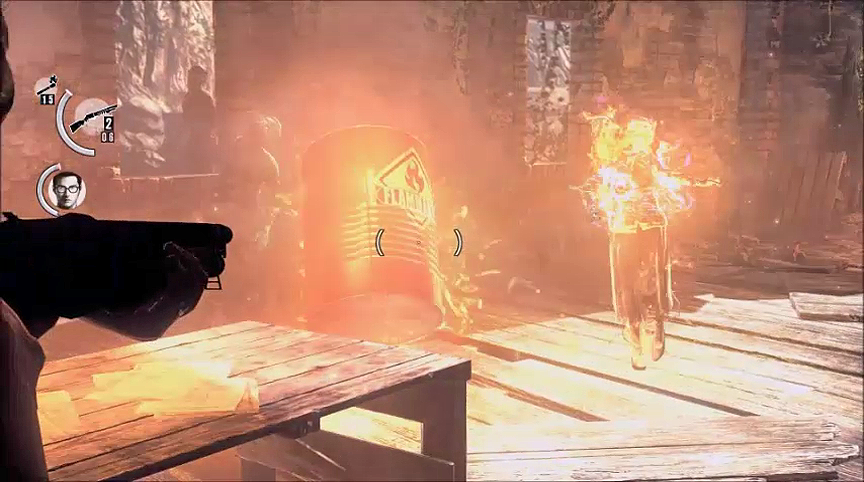
» Matches are vital. They are your best 'weapon'. They can burn enemies before they come to life, they burn fallen enemies in bunches, they can help keep a certain boss at bay. Upgrading them is cheap, so it's wise to invest in doing this before anything else.
» The Agony Bow is a treasure. Even when it is not fully upgraded, it is probably the most effective weapon. Its Flash Bolts, Shock Bolts and Freeze Bolts are your best friends. Flash Bolts stun enemies so that you can kill them with stealth, Shock Bolts stop enemies in groups and you can burn them with a single match when they fall, Freeze Bolts freeze enemies and you can either smash them or wait for them to break on their own. And of course it's the seemingly humble Harpoon, which however can seriously hurt enemies and when it is fully upgraded it becomes a super powerful Fire Bolt that insta-kills whoever it shoots.
» The Shotgun is essential. Maybe not that powerful when not upgraded, but it has great stopping power and it can keep enemies away when you are out of room to run.
» The Sprint ability is life-saving, so you should start upgrading it as soon as possible. It is not necessary to boost it to the last level, but try to bring it up to a decent one. You definitely must be able to sprint long enough from a point and on.
Most of the situations in Akumu are as tense and as tough as they come, however there are certain ones that require much more caution, strategy and patience.
The Butcher Sadist (Chapter 1)
Not really a tough section per se, but it gets significantly more challenging in Akumu due to the part where you have to sneak past the Sadist in the hospital room and the storage area that is beyond it. In the lower difficulties, the path to the exit is clear and you can just wait until the Sadist looks away and run to the door. In Akumu however the path is blocked by crates. For some reason, Sebastian is not able to smash them yet (thankfully he gains that ability in the next chapter), which means that you need to have the Sadist get in the storage room and break them with his chainsaw without seeing you.
This is also the case on Nightmare difficulty (the hardest of the regular modes), so if you have completed this mode already, you more or less know how to move. When the Sadist smashed the crates, I threw a bottle inside the previous room, so he immediately rushed there, giving me time to get outside.
It is notable, however, that while in the lower difficulties even if the Sadist spots you as you are running for the exit, he will start chasing you but most likely won't hit you, in Akumu (and Nightmare as well) if he notices Sebastian, our hero is doomed to suffer a rather gruesome death by the dreadful chainsaw.
The Haunted Bunch (Chapter 2)
This is the section after the one where you get the cutscene with the two villagers that turn into Haunted. After you get past this part, there is this vast open area with a few ruined houses and several Haunted patrolling the field. There are way more zombies in Akumu than in the lower difficulties, and moreover they are much more agile and can sense Sebastian way easier and faster. A serious disadvantage for Sebastian here is that the pistol that he found earlier has very little ammo in it, but this is only a minor reason why you shouldn't use it. The main reason is that the slightest gunshot will attract the attention of all the zombies in the area and Sebastian will be swarmed. To make things worse in this part, accidentally stepping on a bear trap equals instant death.

What I did to get past this cursed section was to stealthily kill the three zombies that hold torches. Two of them are in the main open area, and a third one is patrolling in the garden of the lone house at the end of the path on the right side (it's the house that holds the map fragment). This way, I had three torches available to use against enemies. The torches burn them to death instantly and you don't have to waste any matches to burn the corpses afterwards. Just make sure you get away from them after burning them, because thanks to this mode's unforgiving mechanics, they are still able to attack you as they burn to death. Another thing I did was to move around carefully and stealth-kill whoever I could. I managed to lure an enemy or two towards a bear trap, then I carefully went up to them and set them on fire with a match. It's a bit tricky, however, because they can still hit you and thus insta-kill you as they wave their arms in panic while trapped.
The Village (Chapter 3)
This section is very demanding and it has several zombies appearing out of nowhere. To make things worse, there is a bonus Ruvik clone who is patrolling close to the exit gate. This guy goes down very easily, even in Akumu, as long as you don't allow him to spawn those deadly claw arms from the ground. On the contrary, the one who can really be a pain is the lone sniper on top of a balcony on the far left. This guy is more dangerous than the Ruvik clone, because he can get you randomly any given time. At some point, I had just disposed of the Ruvik clone and next thing you know, Sebastian was falling dead from the sniper's shot.
The game won't let you choose the Akumu mode on a New Game Plus, which means that the first time you play in this difficulty will be in a fresh New Game. That said, there are certain things to keep in mind as you go:
» You shouldn't waste green gel on upgrading Sebastian's life gauge, syringe-carrying capability or syringe recovery. It doesn't matter if your life is just one dot or one full bar; if you get hit, you will instantly die anyway.
» Matches are vital. They are your best 'weapon'. They can burn enemies before they come to life, they burn fallen enemies in bunches, they can help keep a certain boss at bay. Upgrading them is cheap, so it's wise to invest in doing this before anything else.
» The Agony Bow is a treasure. Even when it is not fully upgraded, it is probably the most effective weapon. Its Flash Bolts, Shock Bolts and Freeze Bolts are your best friends. Flash Bolts stun enemies so that you can kill them with stealth, Shock Bolts stop enemies in groups and you can burn them with a single match when they fall, Freeze Bolts freeze enemies and you can either smash them or wait for them to break on their own. And of course it's the seemingly humble Harpoon, which however can seriously hurt enemies and when it is fully upgraded it becomes a super powerful Fire Bolt that insta-kills whoever it shoots.
» The Shotgun is essential. Maybe not that powerful when not upgraded, but it has great stopping power and it can keep enemies away when you are out of room to run.
» The Sprint ability is life-saving, so you should start upgrading it as soon as possible. It is not necessary to boost it to the last level, but try to bring it up to a decent one. You definitely must be able to sprint long enough from a point and on.
Most of the situations in Akumu are as tense and as tough as they come, however there are certain ones that require much more caution, strategy and patience.
The Butcher Sadist (Chapter 1)

This is also the case on Nightmare difficulty (the hardest of the regular modes), so if you have completed this mode already, you more or less know how to move. When the Sadist smashed the crates, I threw a bottle inside the previous room, so he immediately rushed there, giving me time to get outside.
It is notable, however, that while in the lower difficulties even if the Sadist spots you as you are running for the exit, he will start chasing you but most likely won't hit you, in Akumu (and Nightmare as well) if he notices Sebastian, our hero is doomed to suffer a rather gruesome death by the dreadful chainsaw.
The Haunted Bunch (Chapter 2)
This is the section after the one where you get the cutscene with the two villagers that turn into Haunted. After you get past this part, there is this vast open area with a few ruined houses and several Haunted patrolling the field. There are way more zombies in Akumu than in the lower difficulties, and moreover they are much more agile and can sense Sebastian way easier and faster. A serious disadvantage for Sebastian here is that the pistol that he found earlier has very little ammo in it, but this is only a minor reason why you shouldn't use it. The main reason is that the slightest gunshot will attract the attention of all the zombies in the area and Sebastian will be swarmed. To make things worse in this part, accidentally stepping on a bear trap equals instant death.

What I did to get past this cursed section was to stealthily kill the three zombies that hold torches. Two of them are in the main open area, and a third one is patrolling in the garden of the lone house at the end of the path on the right side (it's the house that holds the map fragment). This way, I had three torches available to use against enemies. The torches burn them to death instantly and you don't have to waste any matches to burn the corpses afterwards. Just make sure you get away from them after burning them, because thanks to this mode's unforgiving mechanics, they are still able to attack you as they burn to death. Another thing I did was to move around carefully and stealth-kill whoever I could. I managed to lure an enemy or two towards a bear trap, then I carefully went up to them and set them on fire with a match. It's a bit tricky, however, because they can still hit you and thus insta-kill you as they wave their arms in panic while trapped.
The Village (Chapter 3)
This section is very demanding and it has several zombies appearing out of nowhere. To make things worse, there is a bonus Ruvik clone who is patrolling close to the exit gate. This guy goes down very easily, even in Akumu, as long as you don't allow him to spawn those deadly claw arms from the ground. On the contrary, the one who can really be a pain is the lone sniper on top of a balcony on the far left. This guy is more dangerous than the Ruvik clone, because he can get you randomly any given time. At some point, I had just disposed of the Ruvik clone and next thing you know, Sebastian was falling dead from the sniper's shot.

So I figured that it would be clever to kill the sniper first and clear that area, then go for the Ruvik clone: I explored the village carefully, collecting items and stuff; I visited the barn, both of its floors, the watchtower and all the areas up to the part where the Ruvik clone was patrolling. All this in the sneak position, to eliminate the possibility of an unexpected attack. Then I moved to the back of the barn, killed the enemies there and entered carefully the house with the lone sniper. Now this part was quite tricky and nasty, as the zombies that are in that house are able to surprise you in all the wrong moments. It all ended well though, and in the end I managed to exit in the balcony and stealth-kill the damned sniper.
After this, getting rid of the Ruvik clone was a piece of cake. Although for some reason it seems impossible to sneak behind him and kill him with stealth; he will always sense Sebastian and turn around before you have the time to attack him. It looks like only in Casual you can do this; some people claim that it is possible in Survival too, but I never got it to happen; let alone in Nightmare or Akumu. So I shot an explosive arrow on him and it was all over in seconds.
The Village Sadist (Chapter 3)

Unlike the Sadist in the butchery, you have to kill this one to move on. Explosive arrows work great to make him lose enough health, and then you can shoot a couple of Flash Bolts to stun him and sneak up to him tio finish him off with the knife. If you plan your moves well, you won't even have to worry about the random minions that will be coming along - the Flash Bolt will keep them stunned anyway.
The Blood Pool (Chapter 4)

This is the part where you drop after Sebastian decides to run after Ruvik and gets separated from Leslie and the doctor. In lower difficulties, you only have to deal with zombies (of several sizes) here. Since I had already completed Nightmare, I knew that I had to fight a Ruvik clone in Akumu as well. Thankfully, the clone waits on the other side of the pool, so I had the time to fend off several enemies with a grenade, and then I run to him, hoping to catch him while he was standing on the oil patch. What I did in my Nightmare playthrough, I did here as well: I hit him with the Shotgun while he was standing on the oil patch, before he had the time to spawn the creepy Laura hands from the floor, and he was set on fire immediately.
Saving Juli (Chapter 5)

This section in Chapter 5 is by far the worst up to that point in the game. The situation itself would have been significantly easier if you didn't have to worry about Joseph (thankfully the one-hit-kill thing doesn't apply to him). Because the game knows you are playing on Akumu, it will do its best to make things impossible for Sebastian, having nearly all the enemies attacking his partner, causing him serious damage.
The first sequence is probably the toughest, as Sebastian is on top of the balcony and Joseph is already surrounded by enemies below. What I did was to shoot a few explosive bolts from above, to rid of as many enemies as I could. I then jumped down and stayed close to Joseph, using mostly my trusty shotgun and burning the fallen enemies in groups.
After the checkpoint, several enemies come running, dynamite in hand. Sometimes Joseph will shoot them down before they get too close, but it's better to shoot them yourself too just to be sure. Other times the enemies will remain on the balcony and throw dynamites where Sebastian and Joseph are. This can be very helpful because the dropped dynamites can insta-kill other enemies that are chasing you (just make sure you are not near when the explosion happens). Incidentally I noticed that, after the checkpoint, Joseph would never get hit. Not sure if this was random or it's something intended by the game, but in any event it was very good news. It gave me enough freedom to run around, and deal with enemies hiding on the balcony.

When the next bunch arrived, I shot a Shock Bolt which electrified most of them, and then I burned them with a match. The remaining ones were dealth with with my pistol mostly. There was a stray one who started chasing Sebastian, dynamite in hand. I lured him on the balcony and kept on running. Within seconds I heard a 'kaboom!' as he was obviously killed by his own weapon.
Laura (Chapter 5)
As if Laura wasn't enough of a painful story by default, now in Akumu (like in Nightmare) there are no explosive barrels to make your life easier; you have to rely on the two torches, the several corpses and the two furnace rooms, hoping that she will be burned enough to die (for now).

Laura spawns in the middle of the room, via a corpse, once you approach that area. I always find it better to burn her with one of the torches at that point, to inflict more damage on her. I then run around and stand by each one of the corpses, using a match to burn the dead body as soon as she spawns. I also use the second torch when I get close to it.
As for the furnace rooms, the one on the left (when the exit is in front of you) is I think the most convenient; in the other one, Laura always manages to get me. In any event, as long as you start the furnace and make sure Laura gets burned once from its flames, you can run around in circles to lure her there once more; the flames in the furnace raise and fall continuously, so at some point, as Laura is chasing Sebastian, she will be burnt one more time, and hopefully this will be the fatal one.
The Burning House (Chapter 6)
This chapter is, from start to finish, what truly makes this mode what it is. If you manage to go through it in Akumu and succeed in completing it, you are essentially done with this difficulty. Although the rest of the game features several extremely challenging and frustrating situations until the finale, nothing can compare to the absolute and total nightmare that is Chapter 6.
First is the two-storey burning house, where Joseph has to dismante two consecutive bomb-trapped doors. The floor where you begin is probably the worst, as you have very limited space to move. There are also the two barrels you can use against the enemies, but you have to be careful because if you are too close when they catch fire, Sebastian may burn to death. And I have to state here that the lack of a checkpoint between the two floors is just plainly cruel and insane.

After several retries, I saw that when a certain number of enemies have appeared, no additional ones will show up as long as the last bunch stays alive. So I killed the first small waves, threw a grenade when the bigger one was about to burst in, and then shot a Flash Bolt to stun the remaining ones, until Joseph was ready to open the door.
The lower floor where the second part of this crazy battle takes place looks better because you have more space to move, but in fact it's a lot trickier than the previous room because the enemies arrive from several spots and can easily overwhelm you. What I did was to move next to Joseph and stay close to him for most of the time, trying to keep the enemies back as much as I could by shooting them down as they approached and then burning them. I shot Flash Bolts, Shock Bolts, whatever I could so as to make sure noone would get close to Sebastian and his partner.
The Ruins (Chapter 6)

This next part can be done really fast but it can also frustrate the hell out of you. You need to kill the four enemies that are throwing arrows from the tower as quickly as possible, because the longer they stay live, the more zombies will be spawning from all directions. I managed to get done with this part relatively quickly and with not so many retries. In fact my biggest problem was Joseph who would constantly get fatally hit, and far less the enemies that would attack Sebastian.
The Bridge (Chapter 6)

The next tough part is beyond the bridge, after Sebastian saves Joseph from the guillotine. While Joseph is turning the wheel to open the gate for what seems to be a century and a half, Sebastian has to fight off the incoming zombies. This section was a much more a pain than I expected it to be, moreso because every now and then a zombie would attack Joseph and hit him to death. I reloaded this part way more times than I did the previous one (though not as many as the burning house one).
Zehn and Neun (Chapter 6)

Next up, the two boys move on to the market place for some peace and quiet, which unfortunately doesn't last for too long, as a few steps further Sebastian will have to defeat the cute twins, Zehn and Neun. I don't know which is which so I will just say the first and the second. The first twin is easier because he moves more slowly and you have the time to prepare your attacks better. I used a Flash Bolt to stun him and then shot him with a couple of Harpoons and the Shotgun, and when he fell on his knees, I finished him off with the pistol. The second twin is way faster for some inexplicable reason, and he is also significantly more resilient. I stunned him with two consecutive Flash Bolts, used the Shotgun to make him fall and killed him with the pistol, like I did with his brother.
The Sentinel (Chapter 6)

The Sentinel in Akumu is very gross and disgusting because not only it will insta-kill Sebastian if its attack is successful, but moreover the result of such an attack is that Sebastian will be in pieces all over the yard. To avoid witnessing such a macabre scene, I first threw two grenades in the bushes where the Sentinel ran to hide after the cutscene. When it emerged outside, obviously dizzied by the explosions, I had the chance to shoot it with the Shotgun a few times. It then hid in another bush, so I shot Shock Bolts in there to hopefully stun it. I then shot it with the Shotgun a few more times and I have to say I was surprised to see it go down so quickly.
The Keepers Room (Chapter 7)

I don't know if it was because I had gone through the impossible trial that was Chapter 6, or because Chapter 7 is indeed much easier, but I had no real issues with this level, and the Keepers in the room where you are trapped after Leslie runs away is quite easy to deal with. These Keepers don't need a lot of ammo to go down, and can be successfully stunned with a simple Harpoon if shot at the right time; then you can finish them off even with the pistol, although Explosive Bolts are definitely faster. And of course you can always freeze them to gain time. Normally I wouldn't have included this part in this list, as it is so easy in Akumu; but it deserved a place because of the poison timer which moves a lot faster in this mode, adding a bonus challenge to keep you on your toes.
The Babies Cave (Chapter 8)

While Chapter 8 is a promenade even in Nightmare, it is doomed to surprise you in Akumu because of the notorious 'babies': those tiny human-like creatures than spawn in a cave about midway through the chapter, and their bites which pass unnoticed on all lower difficulties, but can be fatal in this mode. What I did to pass this part was to trigger their appearance, and then to start running around, crushing them under my feet and hoping that I wouldn't get bitten by a stray one in the next flooded part.
Ruvik (Chapter 9)

When you enter Ruvik's estate, he will make sure to chase you relentlessly, turning the whole place blue and chasing you around the house. In Akumu difficulty, he chases you for much longer, and he can also teleport much faster and block your path as you are trying to run away, resulting in Sebastian's death. There is not a specific trick to go past these sequences, just be ready to run away as far as possible when the screen turns blue, and don't stop running until the colours are back to normal.
The Trapped Circus Room (Chapter 10)
This is the dark room very close to the start of the chapter, where you have to move to an upper floor and grab a battery, then go to a room on the ground floor and insert it so as to open the exit. There are several alarms in the room connected with tripwire, so it's recommended that you sneak around carefully and dismantle them; also kill the lone zombie who is patrolling in the room. Once you get in the small corridor, the alarms will sound anyway, and in the main room the huge blades will start rotating, with a beautiful but creepy circus musing playing in the background. Up where the battery is, you need to take care of a group of zombies waiting, as well as two snipers who are guarding the balcony on the opposite side. You can shoot those two from inside the room just before your own balcony, and Sebastian won't have to worry about getting hit.

Once you get back down, you will have to sneak under the blades, trigger the appearance of two zombies from the last room then go back and wait for them. If they won't get decapitated by the blades, you can easily kill them when they reach you. You then need to carefully go to that last room, shoot and burn the zombies in there and insert the battery to open the door.
Update note: During my recent Nightmare/New Game/No Upgrades/No Keys playthrough, I found out that you can actually lure almost all the enemies in this room, including the ones on the upper floor, towards the rotating blade, where most of them will get decapitated as soon as they enter the creepy circus area (check my video of this section here). It is a strategy that proves to be life-saving in Akumu mode, given than the only enemies you will seriously need to be careful of are the snipers on the high balconies, whom you can quickly shoot, however, before they become a threat for Sebastian.
Laura (Chapter 10)
Where to begin with this cursed lady. When Laura attacks you in Chapter 10, she has obviously undergone a huge revamp as she is more vicious, a lot tougher, and way faster than during your first meeting with her. Although killing her can be very rewarding in several ways, I prefer to let her be in the higher difficulties because not all the world's ammo seems enough to dispose of her, even if you use all the corpses and all the flames in the rooms to burn her. Before arriving at this part, I had already upgraded my Harpoons to make them Fire Bolts, with which I shot her a few times to keep her away.

The most frustrating part is by far the last one, because not only you have to shoot that many switches to stop the flames, but you moreover have to worry about the several traps scattered on the floor and walls, and all this with Laura breathing down your neck. Using all sorts of arrows that can keep her at bay or stun her for a few seconds (Shock and Freeze Bolts) helps a lot to maintain your sanity at that point until the exit is flame-free so that you can run to the elevator.
The Construction Site (Chapter 11)

I found this part to be a real pain in Nightmare, but when I got to it in Akumu, it didn't seem half as bad. And of course after the unforgettable Chaprter 6, it proved to be as lot easier than I expected. This section has predetermined enemy spawns, which means that if you know your game and are prepared well, you shouldn't have serious issues with it. Stunning the enemies as soon as the shutter opens and then freezing them before they have the time to get out is a good way to deal with the first groups. The biggest problem is caused by the two snipers, but there is a trick for both of them: you must not let the first one reach the balcony above (that is: kill him before he gets there) and as for the second one, find a safe spot (preferably very close to the shutter from where the enemies spawn) and shoot him from there; it may take a while, but you will know that Sebastian will remain unscratched. The zombies with the guns and the explosive bows are more dangerous but if you hide from them they will come out, allowing you to treat them with a Shock Bolt then burn them where they'll drop. There was one lone shooter who wouldn't leave the shutter, but I shot a Flash Bolt close to him which stunned him, then I run towards his spot and taught him a lesson.

The gondola part, however, is unforgiving, considering there is no place to run and you cannot hide anywhere. Shooting the enemies on the leg to make them fall in the chasm seems to work; and those who are too far away from the edge, you can shoot them with the Sniper Rifle or the Fire Bolts - if you have any to spare. It took me several retries to go through this evil sequence, but eventually I did it.
The Flooded Streets (Chapter 11)

What makes this section so much more challenging in Akumu (as in Nightmare) is that now there are no hanging bodies to shoot in the water, which means that the Shigyo will only have Sebastian to occupy its jaws with. Thankfully there are several spots in the water where you can stand (railings, cars), allowing you to catch your breath before moving on. The toughest part is the last one, in the canal just below the building where Juli is. Normally there are several bodies to shoot, but in Akumu there is only one, hanging by the timed gate. You need to swim from car to car and watch the Shigyo's routine before jumping in the water again, until you get to the last car from where you can shoot the body and swim quickly through the opening gate.
The Mannequin Factory (Chapter 11)

Unlike in the lower difficulties, where you have two slowly moving and usually absent-minded Traumas patrolling the corridors of the gas-filled mannequin factory, in Akumu there are instead mannequins set on moving mines which stroll around blocking your path (with that lovely but creepy circus music in the background), ready to explode as soon as they get close to you. You can do as much as watch their route and run forward when they are moving towards the opposite direction, and just hope they won't suddently bump onto you.

In the next part of the factory, where on the lower modes there are zombies where the keycard it, in Akumu there is noone; but there are some sly guys walking around the corridors, dynamite in hand, and if they see you they will light the dynamite and the whole place goes kaboom. So it is recommended that you try to stealthily kill them, moreso because as soon as you unlock the exit, a whole bunch of zombies will burst through. Since you cannot use a firearm here, the Flash Bolt will be your saviour, stunning the enemies and giving you the necessary time to escape.
The Heresy Chase (Chapter 12)

The Heresy takes advantage of its size to intimidate you and try to impose itself on you, but it's exactly its size that you can take advantage of to defeat it. There are a few spots in the bus that it cannot easily reach with its huge hairy legs, you just need to make sure its attack is not headed towards that direction. Also when it is about to attack the place where you are, you can sometimes run and stand directly below it, where it is hard for it to reach you (well, unless it spits its disgusting goo on you). Use a grenade or a Shock Bolt to elimitate its maggots everytime they appear and keep in mind that you may need to waste a couple of Magnum shots on it, to make the battle end faster.
Returning with the Hemostatic (Chapter 12)

While on lower difficulties the appearance of the car with the mounted gun is a literal blessing, as you can dash to it and kill the enemies from your advantageous spot, this same car in Akumu is a curse: it is impossible to run to it without getting fatally hit, so you have to find a way to kill the guy (?) who is operating the gun. There is a safe spot behind the pile of wrecked cars from where you can aim at him with your Sniper Rifle and shoot him on the belly area, which will kill him in one or two shots (depending on how much you have updraded your weapon). Once he is dead, you can freely run to the car - but don't jump onto it yet, you don't want to be overwhelmed by enemies. Lure them a bit away from the car and throw a grenade towards them, which will kill most of them (sometimes all, if they are close together). Then you can jump to the mounted gun and shoot the next bunch of enemies, being very careful of those who carry guns and dynamite, as they can send Sebastian to the next world before he can even blink.When the coast is clear, run to the bus, simply ignoring the rest group of incoming enemies.
The Hotel (Chapter 13)

The Hotel is not extremely difficult in Akumu, it is just very tricky. The Ruvik clone, who appears twice, doesn't make things any easier. There are also much more enemies patrolling in the rooms, and it is recommended that you kill all of them before proceeding, because you need to stay focused as you dismantle or shoot the bombs and traps. I used Freeze bolts for the clones and mostly Fire arrows for the zombies, and generally avoided to equip weapons that make noise, so as to not alert the other zombies that were lurking about. In this seqience too it is wise to move patiently and deal with the enemies one at a time.
The Flooded Platform (Chapter 14)

This is the section close to the start, after you meet the first Ruvik clone and go through a couple of shutters. There is a platform with a train car in a flooded railway and yet one more clone patrolling outside. The first thing you need to do is get rid of the Ruvik clone. Stand close to the entrance and shoot him with the Sniper Rifle to instantly kill him, and the gunshot will alert the snipers from inside the car. This is something you want at this point, so as to lure them out to start looking for you, which will give you the chance to shoot them down from your safe spot without waking anyone elst. In Akumu, there are invisible zombies lurking in the water, so to avoid alerting them you need to walk stealthily on the platform slowly dismantling the alarms and get in the train car at the same pace - if you don't make noise, noone will be alerted.
Next up is that mine-trapped train car and a zombie waiting inside, so throw a grenade to make some of the mines explode, then try to kill the enemy before he gets close to you or manages to hit you. Once inside the train car, shoot any remaining mines and quickly jump out.
Inside Ruvik's Eye (Chapter 15)

This is the large, creepy arena where you get transported after the confrontation with Ruvik in the hospital's corridor. This place looks intimidating, but if you note from where the enemies spawn and have a strategy for it, it can be quite easy. It is not recommended to run around shooting at them because more often than not it will be Game Over before you know it. It is better to find a high spot (preferably the place from where the first bunch spawns) and wait for each group there. They won't be able to attack all together, giving you time to deal with them one by one. Moreover, some of them won't even attempt to climb up where you are, allowing you to kill them at your ease. When the Ruvik clone appears, stay at your high place and shoot the clone with your Rifle. He will die in one shot and Laura's claws (assuming they haven't reached you) will disappear for good. When another wave spawns from that same place, shoot them with a Flash Bolt to stun them and then with a Freeze Bolt and let them break into thin air. And when the Sadist shows up, stay calm at your spot until you have killed at least most of the enemies that are slowly getting up to you, and then run up to the Sadist - doing so, will make him put away the Rocket Launcher and equip a chainsaw - and shoot him with the Magnum. He will drop dead within seconds.
Ruvik (Chapter 15)

All the stages of the boss fight with Ruvik are relatively easy compared to all the insanity you've been through in Akumu, but he is featured here because in the final part where you are lying down and you need to shoot him just once as he is about to eat you, he moves much faster than in the lower difficulties and you must be extremely quick and accurate when you shoot him because if you miss, Sebastian will become his lunch. This is not only a matter of reflexes, it is also a matter of luck; maybe it's more that than anything else.
CONCLUSION
Playing 'The Evil Within' in Akumu is guaranteed to make you a better gamer, but you must be prepared for quite a few nerve-shattering sequences. Once you conquer Chapter 6, you can be sure that the rest of the game will seem almost a walk in the park, but there are still several demanding sequences awaiting, making this mode one of the most hair-pulling, mind-boggling, limit-testing, challenging and fascinating that you'll ever experience.
After this, getting rid of the Ruvik clone was a piece of cake. Although for some reason it seems impossible to sneak behind him and kill him with stealth; he will always sense Sebastian and turn around before you have the time to attack him. It looks like only in Casual you can do this; some people claim that it is possible in Survival too, but I never got it to happen; let alone in Nightmare or Akumu. So I shot an explosive arrow on him and it was all over in seconds.
The Village Sadist (Chapter 3)

Unlike the Sadist in the butchery, you have to kill this one to move on. Explosive arrows work great to make him lose enough health, and then you can shoot a couple of Flash Bolts to stun him and sneak up to him tio finish him off with the knife. If you plan your moves well, you won't even have to worry about the random minions that will be coming along - the Flash Bolt will keep them stunned anyway.
The Blood Pool (Chapter 4)

This is the part where you drop after Sebastian decides to run after Ruvik and gets separated from Leslie and the doctor. In lower difficulties, you only have to deal with zombies (of several sizes) here. Since I had already completed Nightmare, I knew that I had to fight a Ruvik clone in Akumu as well. Thankfully, the clone waits on the other side of the pool, so I had the time to fend off several enemies with a grenade, and then I run to him, hoping to catch him while he was standing on the oil patch. What I did in my Nightmare playthrough, I did here as well: I hit him with the Shotgun while he was standing on the oil patch, before he had the time to spawn the creepy Laura hands from the floor, and he was set on fire immediately.

This section in Chapter 5 is by far the worst up to that point in the game. The situation itself would have been significantly easier if you didn't have to worry about Joseph (thankfully the one-hit-kill thing doesn't apply to him). Because the game knows you are playing on Akumu, it will do its best to make things impossible for Sebastian, having nearly all the enemies attacking his partner, causing him serious damage.
The first sequence is probably the toughest, as Sebastian is on top of the balcony and Joseph is already surrounded by enemies below. What I did was to shoot a few explosive bolts from above, to rid of as many enemies as I could. I then jumped down and stayed close to Joseph, using mostly my trusty shotgun and burning the fallen enemies in groups.

When the next bunch arrived, I shot a Shock Bolt which electrified most of them, and then I burned them with a match. The remaining ones were dealth with with my pistol mostly. There was a stray one who started chasing Sebastian, dynamite in hand. I lured him on the balcony and kept on running. Within seconds I heard a 'kaboom!' as he was obviously killed by his own weapon.
Laura (Chapter 5)
As if Laura wasn't enough of a painful story by default, now in Akumu (like in Nightmare) there are no explosive barrels to make your life easier; you have to rely on the two torches, the several corpses and the two furnace rooms, hoping that she will be burned enough to die (for now).

Laura spawns in the middle of the room, via a corpse, once you approach that area. I always find it better to burn her with one of the torches at that point, to inflict more damage on her. I then run around and stand by each one of the corpses, using a match to burn the dead body as soon as she spawns. I also use the second torch when I get close to it.
As for the furnace rooms, the one on the left (when the exit is in front of you) is I think the most convenient; in the other one, Laura always manages to get me. In any event, as long as you start the furnace and make sure Laura gets burned once from its flames, you can run around in circles to lure her there once more; the flames in the furnace raise and fall continuously, so at some point, as Laura is chasing Sebastian, she will be burnt one more time, and hopefully this will be the fatal one.
The Burning House (Chapter 6)
This chapter is, from start to finish, what truly makes this mode what it is. If you manage to go through it in Akumu and succeed in completing it, you are essentially done with this difficulty. Although the rest of the game features several extremely challenging and frustrating situations until the finale, nothing can compare to the absolute and total nightmare that is Chapter 6.
First is the two-storey burning house, where Joseph has to dismante two consecutive bomb-trapped doors. The floor where you begin is probably the worst, as you have very limited space to move. There are also the two barrels you can use against the enemies, but you have to be careful because if you are too close when they catch fire, Sebastian may burn to death. And I have to state here that the lack of a checkpoint between the two floors is just plainly cruel and insane.
After several retries, I saw that when a certain number of enemies have appeared, no additional ones will show up as long as the last bunch stays alive. So I killed the first small waves, threw a grenade when the bigger one was about to burst in, and then shot a Flash Bolt to stun the remaining ones, until Joseph was ready to open the door.
The lower floor where the second part of this crazy battle takes place looks better because you have more space to move, but in fact it's a lot trickier than the previous room because the enemies arrive from several spots and can easily overwhelm you. What I did was to move next to Joseph and stay close to him for most of the time, trying to keep the enemies back as much as I could by shooting them down as they approached and then burning them. I shot Flash Bolts, Shock Bolts, whatever I could so as to make sure noone would get close to Sebastian and his partner.
The Ruins (Chapter 6)

This next part can be done really fast but it can also frustrate the hell out of you. You need to kill the four enemies that are throwing arrows from the tower as quickly as possible, because the longer they stay live, the more zombies will be spawning from all directions. I managed to get done with this part relatively quickly and with not so many retries. In fact my biggest problem was Joseph who would constantly get fatally hit, and far less the enemies that would attack Sebastian.
The Bridge (Chapter 6)

The next tough part is beyond the bridge, after Sebastian saves Joseph from the guillotine. While Joseph is turning the wheel to open the gate for what seems to be a century and a half, Sebastian has to fight off the incoming zombies. This section was a much more a pain than I expected it to be, moreso because every now and then a zombie would attack Joseph and hit him to death. I reloaded this part way more times than I did the previous one (though not as many as the burning house one).
Zehn and Neun (Chapter 6)

Next up, the two boys move on to the market place for some peace and quiet, which unfortunately doesn't last for too long, as a few steps further Sebastian will have to defeat the cute twins, Zehn and Neun. I don't know which is which so I will just say the first and the second. The first twin is easier because he moves more slowly and you have the time to prepare your attacks better. I used a Flash Bolt to stun him and then shot him with a couple of Harpoons and the Shotgun, and when he fell on his knees, I finished him off with the pistol. The second twin is way faster for some inexplicable reason, and he is also significantly more resilient. I stunned him with two consecutive Flash Bolts, used the Shotgun to make him fall and killed him with the pistol, like I did with his brother.
The Sentinel (Chapter 6)

The Sentinel in Akumu is very gross and disgusting because not only it will insta-kill Sebastian if its attack is successful, but moreover the result of such an attack is that Sebastian will be in pieces all over the yard. To avoid witnessing such a macabre scene, I first threw two grenades in the bushes where the Sentinel ran to hide after the cutscene. When it emerged outside, obviously dizzied by the explosions, I had the chance to shoot it with the Shotgun a few times. It then hid in another bush, so I shot Shock Bolts in there to hopefully stun it. I then shot it with the Shotgun a few more times and I have to say I was surprised to see it go down so quickly.
The Keepers Room (Chapter 7)

I don't know if it was because I had gone through the impossible trial that was Chapter 6, or because Chapter 7 is indeed much easier, but I had no real issues with this level, and the Keepers in the room where you are trapped after Leslie runs away is quite easy to deal with. These Keepers don't need a lot of ammo to go down, and can be successfully stunned with a simple Harpoon if shot at the right time; then you can finish them off even with the pistol, although Explosive Bolts are definitely faster. And of course you can always freeze them to gain time. Normally I wouldn't have included this part in this list, as it is so easy in Akumu; but it deserved a place because of the poison timer which moves a lot faster in this mode, adding a bonus challenge to keep you on your toes.
The Babies Cave (Chapter 8)

While Chapter 8 is a promenade even in Nightmare, it is doomed to surprise you in Akumu because of the notorious 'babies': those tiny human-like creatures than spawn in a cave about midway through the chapter, and their bites which pass unnoticed on all lower difficulties, but can be fatal in this mode. What I did to pass this part was to trigger their appearance, and then to start running around, crushing them under my feet and hoping that I wouldn't get bitten by a stray one in the next flooded part.
Ruvik (Chapter 9)

When you enter Ruvik's estate, he will make sure to chase you relentlessly, turning the whole place blue and chasing you around the house. In Akumu difficulty, he chases you for much longer, and he can also teleport much faster and block your path as you are trying to run away, resulting in Sebastian's death. There is not a specific trick to go past these sequences, just be ready to run away as far as possible when the screen turns blue, and don't stop running until the colours are back to normal.
The Trapped Circus Room (Chapter 10)
This is the dark room very close to the start of the chapter, where you have to move to an upper floor and grab a battery, then go to a room on the ground floor and insert it so as to open the exit. There are several alarms in the room connected with tripwire, so it's recommended that you sneak around carefully and dismantle them; also kill the lone zombie who is patrolling in the room. Once you get in the small corridor, the alarms will sound anyway, and in the main room the huge blades will start rotating, with a beautiful but creepy circus musing playing in the background. Up where the battery is, you need to take care of a group of zombies waiting, as well as two snipers who are guarding the balcony on the opposite side. You can shoot those two from inside the room just before your own balcony, and Sebastian won't have to worry about getting hit.

Once you get back down, you will have to sneak under the blades, trigger the appearance of two zombies from the last room then go back and wait for them. If they won't get decapitated by the blades, you can easily kill them when they reach you. You then need to carefully go to that last room, shoot and burn the zombies in there and insert the battery to open the door.
Update note: During my recent Nightmare/New Game/No Upgrades/No Keys playthrough, I found out that you can actually lure almost all the enemies in this room, including the ones on the upper floor, towards the rotating blade, where most of them will get decapitated as soon as they enter the creepy circus area (check my video of this section here). It is a strategy that proves to be life-saving in Akumu mode, given than the only enemies you will seriously need to be careful of are the snipers on the high balconies, whom you can quickly shoot, however, before they become a threat for Sebastian.
Laura (Chapter 10)
Where to begin with this cursed lady. When Laura attacks you in Chapter 10, she has obviously undergone a huge revamp as she is more vicious, a lot tougher, and way faster than during your first meeting with her. Although killing her can be very rewarding in several ways, I prefer to let her be in the higher difficulties because not all the world's ammo seems enough to dispose of her, even if you use all the corpses and all the flames in the rooms to burn her. Before arriving at this part, I had already upgraded my Harpoons to make them Fire Bolts, with which I shot her a few times to keep her away.

The most frustrating part is by far the last one, because not only you have to shoot that many switches to stop the flames, but you moreover have to worry about the several traps scattered on the floor and walls, and all this with Laura breathing down your neck. Using all sorts of arrows that can keep her at bay or stun her for a few seconds (Shock and Freeze Bolts) helps a lot to maintain your sanity at that point until the exit is flame-free so that you can run to the elevator.
The Construction Site (Chapter 11)

I found this part to be a real pain in Nightmare, but when I got to it in Akumu, it didn't seem half as bad. And of course after the unforgettable Chaprter 6, it proved to be as lot easier than I expected. This section has predetermined enemy spawns, which means that if you know your game and are prepared well, you shouldn't have serious issues with it. Stunning the enemies as soon as the shutter opens and then freezing them before they have the time to get out is a good way to deal with the first groups. The biggest problem is caused by the two snipers, but there is a trick for both of them: you must not let the first one reach the balcony above (that is: kill him before he gets there) and as for the second one, find a safe spot (preferably very close to the shutter from where the enemies spawn) and shoot him from there; it may take a while, but you will know that Sebastian will remain unscratched. The zombies with the guns and the explosive bows are more dangerous but if you hide from them they will come out, allowing you to treat them with a Shock Bolt then burn them where they'll drop. There was one lone shooter who wouldn't leave the shutter, but I shot a Flash Bolt close to him which stunned him, then I run towards his spot and taught him a lesson.

The gondola part, however, is unforgiving, considering there is no place to run and you cannot hide anywhere. Shooting the enemies on the leg to make them fall in the chasm seems to work; and those who are too far away from the edge, you can shoot them with the Sniper Rifle or the Fire Bolts - if you have any to spare. It took me several retries to go through this evil sequence, but eventually I did it.
The Flooded Streets (Chapter 11)

What makes this section so much more challenging in Akumu (as in Nightmare) is that now there are no hanging bodies to shoot in the water, which means that the Shigyo will only have Sebastian to occupy its jaws with. Thankfully there are several spots in the water where you can stand (railings, cars), allowing you to catch your breath before moving on. The toughest part is the last one, in the canal just below the building where Juli is. Normally there are several bodies to shoot, but in Akumu there is only one, hanging by the timed gate. You need to swim from car to car and watch the Shigyo's routine before jumping in the water again, until you get to the last car from where you can shoot the body and swim quickly through the opening gate.
The Mannequin Factory (Chapter 11)

Unlike in the lower difficulties, where you have two slowly moving and usually absent-minded Traumas patrolling the corridors of the gas-filled mannequin factory, in Akumu there are instead mannequins set on moving mines which stroll around blocking your path (with that lovely but creepy circus music in the background), ready to explode as soon as they get close to you. You can do as much as watch their route and run forward when they are moving towards the opposite direction, and just hope they won't suddently bump onto you.

In the next part of the factory, where on the lower modes there are zombies where the keycard it, in Akumu there is noone; but there are some sly guys walking around the corridors, dynamite in hand, and if they see you they will light the dynamite and the whole place goes kaboom. So it is recommended that you try to stealthily kill them, moreso because as soon as you unlock the exit, a whole bunch of zombies will burst through. Since you cannot use a firearm here, the Flash Bolt will be your saviour, stunning the enemies and giving you the necessary time to escape.
The Heresy Chase (Chapter 12)

The Heresy takes advantage of its size to intimidate you and try to impose itself on you, but it's exactly its size that you can take advantage of to defeat it. There are a few spots in the bus that it cannot easily reach with its huge hairy legs, you just need to make sure its attack is not headed towards that direction. Also when it is about to attack the place where you are, you can sometimes run and stand directly below it, where it is hard for it to reach you (well, unless it spits its disgusting goo on you). Use a grenade or a Shock Bolt to elimitate its maggots everytime they appear and keep in mind that you may need to waste a couple of Magnum shots on it, to make the battle end faster.
Returning with the Hemostatic (Chapter 12)

While on lower difficulties the appearance of the car with the mounted gun is a literal blessing, as you can dash to it and kill the enemies from your advantageous spot, this same car in Akumu is a curse: it is impossible to run to it without getting fatally hit, so you have to find a way to kill the guy (?) who is operating the gun. There is a safe spot behind the pile of wrecked cars from where you can aim at him with your Sniper Rifle and shoot him on the belly area, which will kill him in one or two shots (depending on how much you have updraded your weapon). Once he is dead, you can freely run to the car - but don't jump onto it yet, you don't want to be overwhelmed by enemies. Lure them a bit away from the car and throw a grenade towards them, which will kill most of them (sometimes all, if they are close together). Then you can jump to the mounted gun and shoot the next bunch of enemies, being very careful of those who carry guns and dynamite, as they can send Sebastian to the next world before he can even blink.When the coast is clear, run to the bus, simply ignoring the rest group of incoming enemies.
The Hotel (Chapter 13)

The Hotel is not extremely difficult in Akumu, it is just very tricky. The Ruvik clone, who appears twice, doesn't make things any easier. There are also much more enemies patrolling in the rooms, and it is recommended that you kill all of them before proceeding, because you need to stay focused as you dismantle or shoot the bombs and traps. I used Freeze bolts for the clones and mostly Fire arrows for the zombies, and generally avoided to equip weapons that make noise, so as to not alert the other zombies that were lurking about. In this seqience too it is wise to move patiently and deal with the enemies one at a time.
The Flooded Platform (Chapter 14)

This is the section close to the start, after you meet the first Ruvik clone and go through a couple of shutters. There is a platform with a train car in a flooded railway and yet one more clone patrolling outside. The first thing you need to do is get rid of the Ruvik clone. Stand close to the entrance and shoot him with the Sniper Rifle to instantly kill him, and the gunshot will alert the snipers from inside the car. This is something you want at this point, so as to lure them out to start looking for you, which will give you the chance to shoot them down from your safe spot without waking anyone elst. In Akumu, there are invisible zombies lurking in the water, so to avoid alerting them you need to walk stealthily on the platform slowly dismantling the alarms and get in the train car at the same pace - if you don't make noise, noone will be alerted.
Next up is that mine-trapped train car and a zombie waiting inside, so throw a grenade to make some of the mines explode, then try to kill the enemy before he gets close to you or manages to hit you. Once inside the train car, shoot any remaining mines and quickly jump out.
Inside Ruvik's Eye (Chapter 15)

This is the large, creepy arena where you get transported after the confrontation with Ruvik in the hospital's corridor. This place looks intimidating, but if you note from where the enemies spawn and have a strategy for it, it can be quite easy. It is not recommended to run around shooting at them because more often than not it will be Game Over before you know it. It is better to find a high spot (preferably the place from where the first bunch spawns) and wait for each group there. They won't be able to attack all together, giving you time to deal with them one by one. Moreover, some of them won't even attempt to climb up where you are, allowing you to kill them at your ease. When the Ruvik clone appears, stay at your high place and shoot the clone with your Rifle. He will die in one shot and Laura's claws (assuming they haven't reached you) will disappear for good. When another wave spawns from that same place, shoot them with a Flash Bolt to stun them and then with a Freeze Bolt and let them break into thin air. And when the Sadist shows up, stay calm at your spot until you have killed at least most of the enemies that are slowly getting up to you, and then run up to the Sadist - doing so, will make him put away the Rocket Launcher and equip a chainsaw - and shoot him with the Magnum. He will drop dead within seconds.
Ruvik (Chapter 15)

All the stages of the boss fight with Ruvik are relatively easy compared to all the insanity you've been through in Akumu, but he is featured here because in the final part where you are lying down and you need to shoot him just once as he is about to eat you, he moves much faster than in the lower difficulties and you must be extremely quick and accurate when you shoot him because if you miss, Sebastian will become his lunch. This is not only a matter of reflexes, it is also a matter of luck; maybe it's more that than anything else.
CONCLUSION
Check also:
The Evil Within 悪夢 -AKUMU- Playthrough (2017)


No comments:
Post a Comment